How to use NirmataVPN
Buy or Extend a Plan
- Open the Account tab.
- Pick a plan (for example, 30 or 90 days). The price is shown in both NIR and its approximate USD value.
- Tap Pay. NirmataVPN requests an invoice and opens your Nirmata wallet through the
Nirmata:link, with the payment address and invoice reference already filled in. - Confirm the amount in the wallet's send form and send the payment.
- The Account screen shows Waiting for payment on-chain…, then Confirming, while the app polls for your transaction. Once it reaches the required confirmations, your subscription activates automatically and the screen updates with your remaining days.
If the wallet doesn't open automatically, the app shows the payment address directly on the Pay to this address card — copy it and send the exact quoted amount from any Nirmata wallet.

Connect
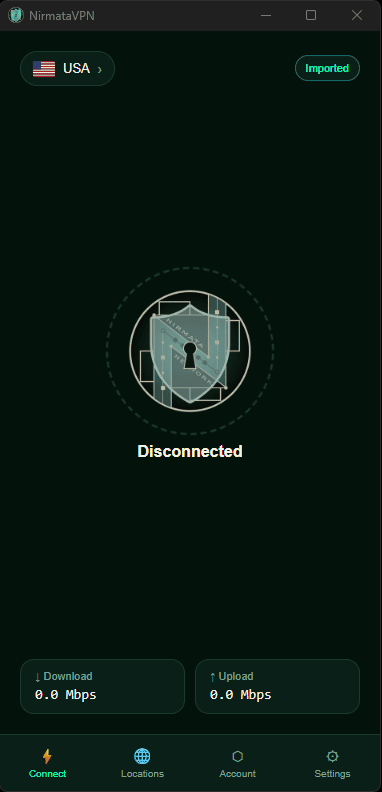
- Go to the Connect tab.
- Tap the location pill at the top to confirm which location you're connected through (see Locations below to change it).
- Tap the large connect button. The first connection on a device asks for permission to create a VPN network adapter — this is a normal one-time OS prompt.
- Once connected, the status changes to Connected, the active protocol is shown beneath it, and the download/upload speed tiles start updating live.
Tap the same button again to disconnect.
Choose a Location
Open the Locations tab to see every available location along with the protocols it supports. Tap one to switch — the app reconnects through the new location if you're already connected.

Choose a Protocol
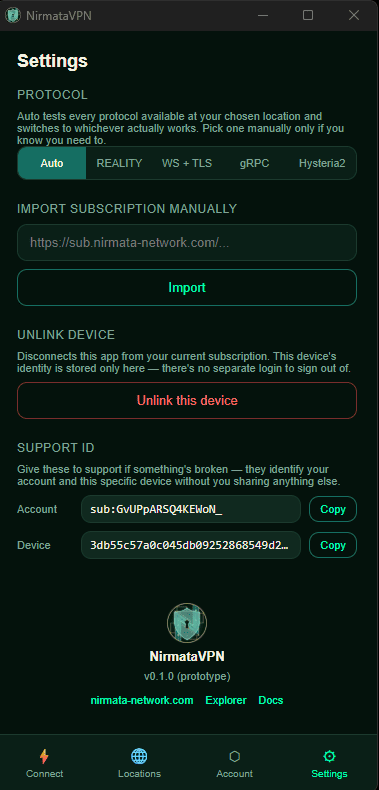
Open Settings → Protocol. Auto (the default) tests every protocol available at your location and switches to whichever actually works, which is the right choice for most people. Pick REALITY, WS + TLS, gRPC or Hysteria2 manually only if you specifically need to force one — for example, because you know your network blocks one of them.
Use Your Subscription on Another Client or Device
Open the Account tab and copy Your subscription link. Paste it into another NirmataVPN install, or into any subscription-compatible client (Happ, Hiddify, sing-box, etc.) to use the same subscription there.
You can also import a subscription link manually from Settings → Import subscription manually — paste the link and tap Import.
Unlink This Device
Settings → Unlink device disconnects the app from your current subscription. Since there is no account to sign out of, this simply clears the local link between this device and your subscription.
Support ID
If you need help, Settings → Support ID shows two identifiers — one for your account and one for this specific device. Share these with support instead of any personal information; they're enough to look up your subscription and device without exposing anything else.